Targeting
This is where you define your media plan strategy. Our new options include the ability to add a list of frame IDs (in order to include or exclude them from your media plan) and to add a list of POS.
Use the navigation bar to settle your line item characteristics:
Geolocations
Geolocations include:
- Locations (such as cities, regions)

- POI (Point Of Interests). Select one or several POIs for your media plan, and do not forget to widen the perimeter around your point(s):

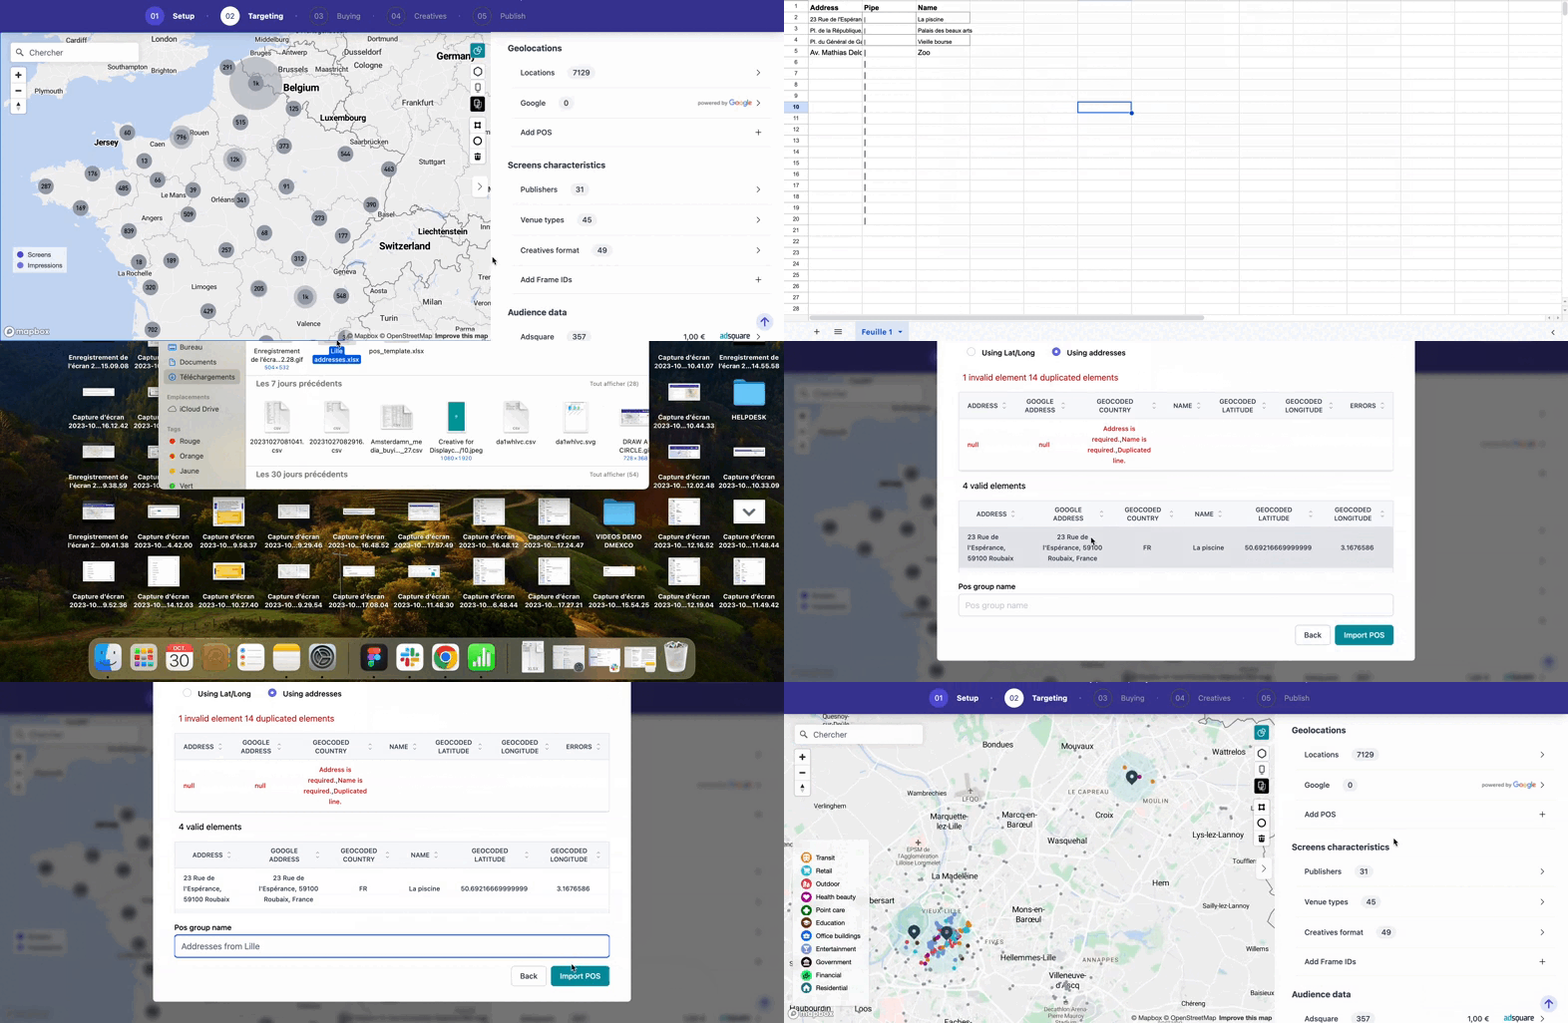
- POS (Point Of Sales): you can now upload specific POS, by Copy / pasting a list of coordinates or address and associated names, as shown in the video below. Please note that if you want to use the coordinates, you need to respect the following format: lat, long, name.
If you want to use the address: address | name

Tip: the special character "|" can be obtained with these shortcuts:
- option + shift + l on Mac
- alt + 124 on Windows
-
- Template to facilitate the upload of POS by addresses
We have improved the upload of POS by addresses thanks to a template that you can download in the pop-up window. Open this template in a dedicated software, and enter the address in the first column and give the address a name in the third column.
When your template is complete, you can drag & drop it in the field of the pop-up window, like so:

Please note that the format accepted is .xlsx
Screens characteristics
- Publishers: select the publishers you would like to include for your media plan. You can see an overview of what you selected at the top of the page, under "My Plan":

- Venue Types:

Note that if you want to know which VTs are available for your targeting (let's say you have entered a location + a publisher), you can go directly to Insights, by clicking on the charts icon on the top-right corner of your map.
- Creatives Formats:

- Add frames IDs: you can now download a list of specific frames IDs according to your preferences. This will allow you to either include them or exclude them from you media plan. In the case you would want to exclude specific frames from your Targeting, you can proceed as such: first, download the file thanks to the download button on top of "Current plan":

The downloaded file contains, among other information, the list of frame IDs for your media plan. Select the ones you wish to exclude from your setting, and copy/paste them into the modal window. You can follow theses steps with the video below:

Data Audience
- MyTraffic: our newly data provider. In the video below, you will discover how to select a certain types of malls and also how to pick a catchment area. Learn more about MyTraffic here.

Adsquare: this service will help you with your audience targeting. The Displayce DSP lets you select one of the hundreds of Adsquare audience segments you want to reach in your line items. The Displayce DSP identifies which screens overweight this target (scoring that can be adjusted in the information card above) and especially WHEN they overweight this target.
In this way, we can buy live screens only when the target is most represented: for example, only on Tuesdays at 10am. 
Data Retail
This data offers a detailed view of peak performance times for proximity stores campaigns. Leveraging this data facilitates strategic programmatic buying, optimizing ad placements and timing. Learn more here.
Updates from October 26th:
Polygones and radius geofencing to create filters
Our update from October 6th allowed you to draw a polygone on your map, in order to see the number of frames included within. The usage of this tool was handy yet pretty simple, and we wanted to provide much more flexibility from it.
New: Draw circles with radius geofencing
Thinking in terms of radius around a specific point or address can help you in your targeting. It is now possible to do so, and to use radius point selector for enlarging or reducing a specific area.
Select the "circle" tool. Click on the map where the center of your circle interests you. In our example, it's the Parc de Vincennes. You can then adjust the radius around this point. In the info bar that appears at the bottom of the map, you'll find the following data on your drawn circle: number of screens, impressions per week, and radius around your point. You can then choose to include or exclude these screens from your targeting.

New shape filters & data data available in Insights section
The shapes now have a filter behavior, giving you the opportunity to learn more about areas in the insights section.

Please note that you can choose to exclude screens from a polygon within a polygon that has included screens, like so:

Modulate your shapes as you like
It is possible to change the color of the shapes your created and rename them, whatever allows you to better organize your targeting.

Once you are done with your targeting, you can jump on our next step by clicking "Next".
